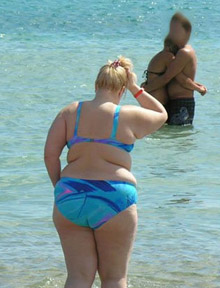
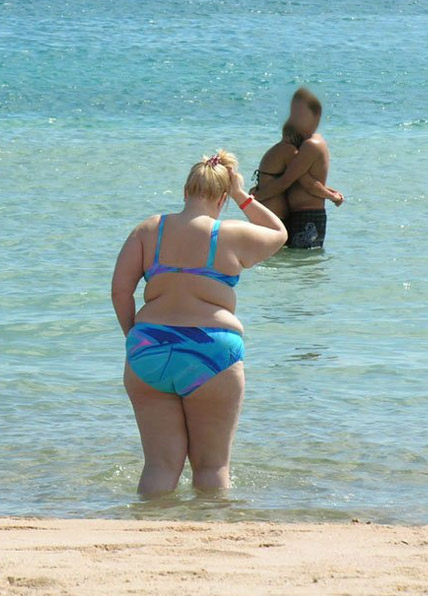
 Consider the photo at left. Now this person probably will not like the way she looks on the beach. Who would?
Photoshop Tutorial Eight (CS6), CC 2017 and CC2020
Nip & Tuck Two: Digital plastic surgery.
By Ross Collins, North Dakota State University
Note: this tutorial is based on a YouTube video feature, one of 'bout a thousand of them covering Photoshop techniques. If you've upgraded to CC 2017 or 2020, however, skip to the updated tutorial below. It offers more powerful tools to make this feature easier, with the opportunity to let Photoshop operate with a more delicate touch.
Digital surgery I: CS6.
To improve reddish skin tones, see Nip & Tuck Tutorial One (skin tones).
Everybody knows nowadays that the models you see in fashion magazines aren't real. They're Photoshop Pholks: normal people with a few (or more) problems made perfect using Photoshop tools.
But what we might not know is how far we can take this. We can produce people who never existed, not even close. One way is to reduce our increasingly obese American society. Photoshop weight reduction won't give us better physical health. (For that, see Ross's Fargo Fit pages.) But it might give us better mental health, as we are spared the pain of seeing how we really look in photos.
Consider the photo at left. Now this person probably will not like the way she looks on the beach. Who would?
Well, we can fix that. And the surprising tool that we'll use is the Liquify Filter.
1. Download this photo and open in Photoshop. Crop as necessary.
2. Choose Liquify from the Filter pulldown.
3. Zoom into the middle section. Note in liquify you can zoom by dragging with the Command key held down. You can adjust by clicking on plus and minus tabs at bottom left.
4. The liquify dialogue box and tools will appear. Toggle Advanced Mode, if you want. Adjust brush size.
5. Push on the midsection with the tool to reduce. Slim the legs and arms and adjust to look natural. (Understanding a little anatomy here helps.)
6. When you're ready, choose OK to save your work.
7. The, um, rear end looks a little big. You can pinch interior areas to make them smaller using the Pinch filter. Choose the area you want to make smaller, then from the Filter pulldown choose Distort, and Pinch. Try the slider to see a preview of what happens.
 8. We need to deal with the folds of skin. Try the Patch Tool (might be under the Healing Brush). Choose an area you'd like to remove, such as the skinfold. Click in the middle of that area, drag to an area you'd like to replace it with, such as clear skin above that area.
9. Work with the Smudge Tool if necessary to smooth out blotches.
10. For more complicated areas, choose the Clone Stamp Tool. Option key + click on a clear area you'd like to clone. Without holding down the mouse button, drag the mouse over the area you'd like to fix. Click to accept the clone.
11. In a previous tutorial we already considered skin blemishes such as moles, pimples, wrinkles or scars. Use the Healing Brush to fix them, if you haven't already. Perfect skin!
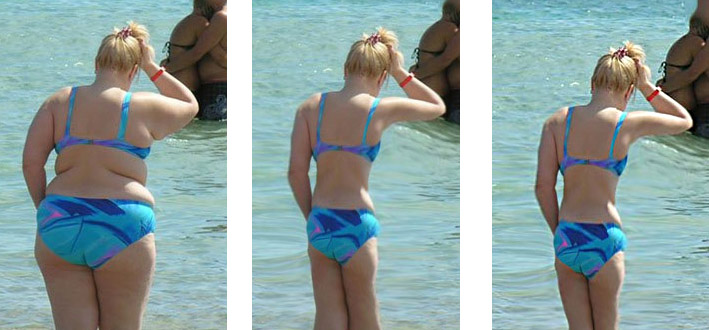
12. With just a few minutes' work, you can create a new person! See below for the before, during and after photos. Yes, it takes a little skill but with a bit of practice you can improve skin, and adjust proportions to make someone model-perfect. Note: This is definitely NOT an ethical photojournalism technique. Some would argue it's not ethical for magazines to do this to models, either, even in advertisements. But if you have grown up with some sort of inferiority complex about yourself based on a comparison with those movie stars and models in magazines, well, now you know a little bit about how they become so perfect!
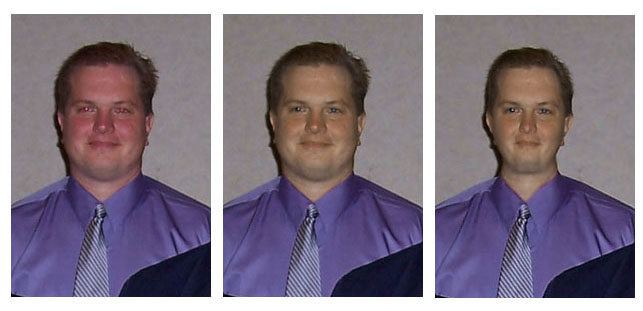
Below we've continued to improve our reddish award winner: fixed red eye, removed blemishes, improved skin tones, slimmed down face. The nose also seemed to be a little big, and the hair needed some smoothing.... Same person? Mmm....
Digital surgery II: CC 2017 and later:
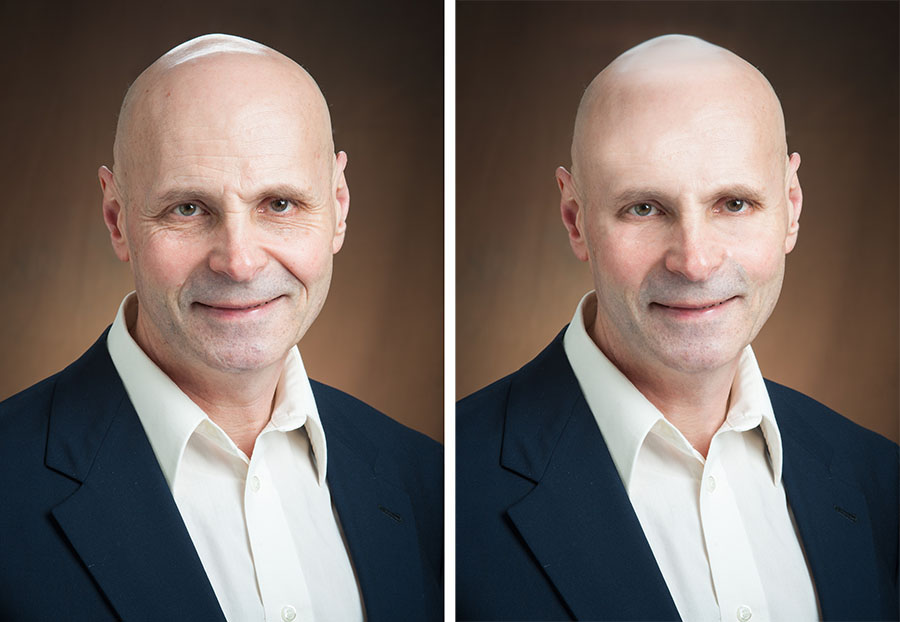
You can still use the tools above to pinch and push (see left side toolbox), but now you also have an extensive panel of options on left to help you out. Open the original photo of the man with the tie from above, or go back to the background layer if you've already worked on the skin tones of this photo.
1. Choose Filter pulldown and Liquify.
2. Choose Face Aware Liquify from the Properties panel. Try the Face Width and Jawline sliders. Note the transformation is more subtle than with a liquify tool. Check out the other tools as well. OK.
3. You've "improved" the face in a subtle way. It's still the same person, just younger and more well rested, as a movie star might look after a facelift. Now let's attack wrinkles.
What to do about wrinkles?
Regarding wrinkles, you have to decide this: do you want to soften them or remove them completely? If someone is old, or even not so old, he or she is going to have at least some wrinkles. It's just the biology of aging. You can remove all of them, but consider that it may look ridiculously unrealistic. But some people don't care. Technique a: removing entire wrinkles. Technique b: softening wrinkles.
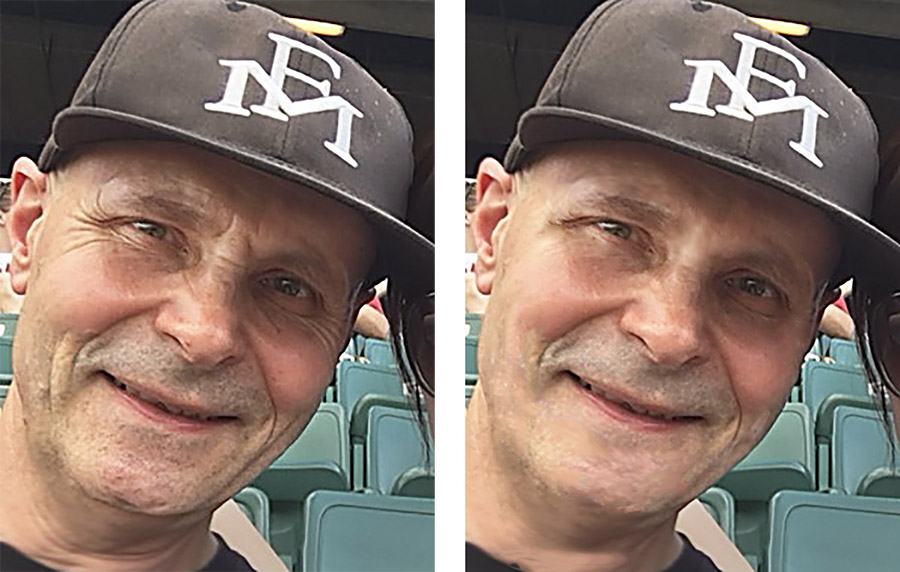
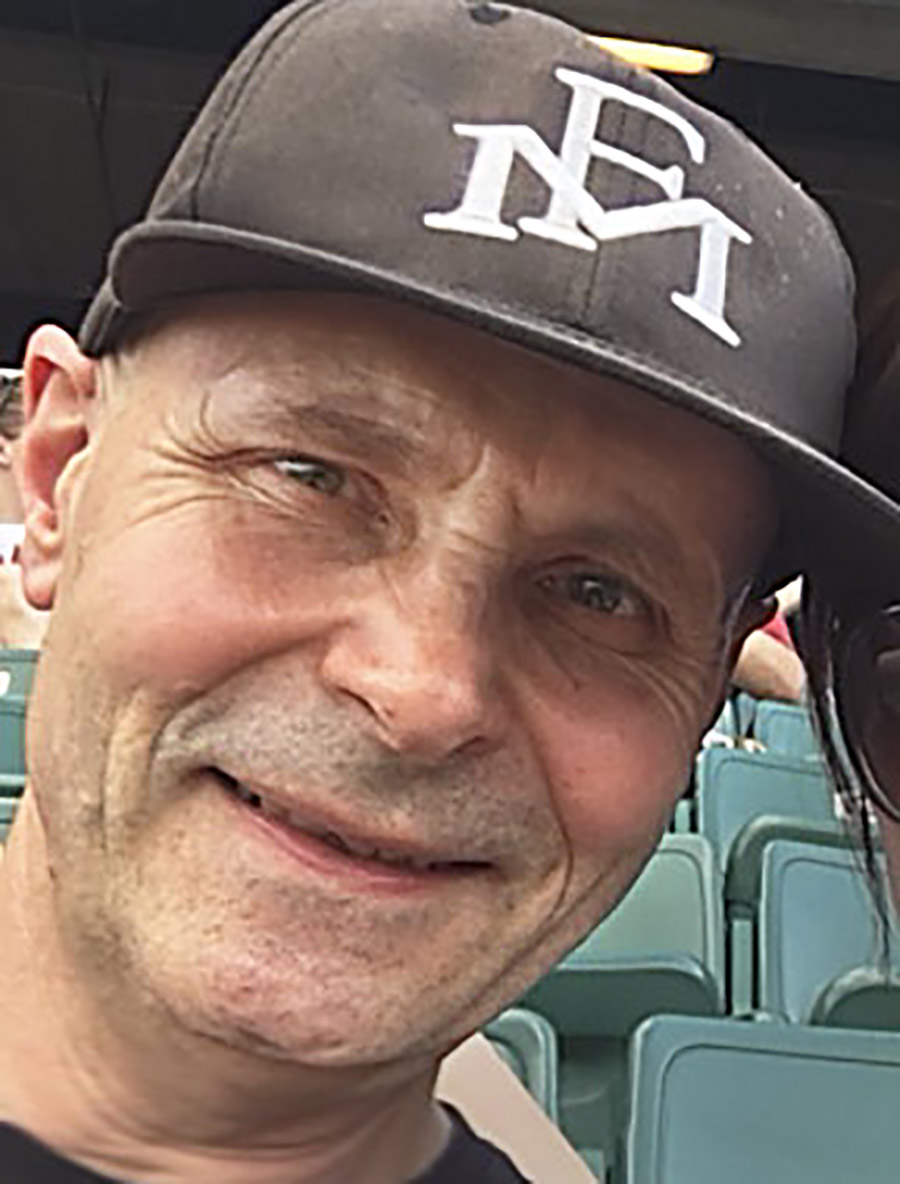
Try working on this photo of me at a Redhawks baseball game. Laugh it up, dude, you'll be here soon enough. Or find a face of your own instead of messing with mine.
Begin by Duplicating the Background Layer (Layers pulldown). In the Sample Mode of the contextual menu at top (it comes up when you choose the Healing Brush) choose Current and Below. Work on the background copy layer.
a. Zoom in on wrinkles. Change workspace to Photography, if necessary. Choose the Healing Brush or Spot Healing Brush, and Mode Normal or Replace. Size brush a little larger than a wrinkle. If choosing the Healing Brush, sample (hold down Option key) an area right next to wrinkle. Then drag on the wrinkle, resampling as necessary. If using Spot Healing Brush, just drag over the wrinkle. It's gone!
Alternatively, remove wrinkles using Content Aware Fill. Choose area with Lasso or other tool. From the Edit pulldown choose Fill, and Content Aware. Let Photoshop work its (?) magic. Choose Edit, and Fade Fill to soften edges.
Try a little Smudge tool to smooth out the differences. Here's my effort.
b. The thing is, well, maybe we should have a little defter touch (is defter a word?). We can soften a wrinkle by repeated and laborious sampling using the Healing Brush or Clone Stamp tool, but it's difficult to get a really convincing match. Instead, try this: Choose the Clone Stamp tool. Under Mode in the contextual menu, choose Lighten. Take a sample right next to the wrinkle, then drag across the wrinkle. Note the wrinkle is still there. But it's lighter, and so less obvious. You can also use this technique to soften blemishes or scars without unrealistically removing them.
Below I put it all together on myself. I softened the wrinkles, narrowed the face slightly, shortened the forehead slightly. I also pulled out a little red from the face based on the Tutorial Six's method using a Hue/Saturation adjustment layer. This is easy and common practice in much of the world of fashion photography. Ethical? Many people think not. What do you think?
Note: Check out this YouTube video for a more detailed demonstration of wrinkle-control methods.