Title

Basics of LoRa Technology for Crop and Livestock Management

(AE1999, Reviewed April 2026)
Summary

LoRaWan (Long Range Wide Area Network) technology uses a long-range and low-power wireless network to communicate between LoRaWAN gateways and remote nodes. By using small, rugged and battery-powered LoRaWAN sensor devices, this technology can be used to monitor farm assets and crop and livestock conditions. LoRaWAN is an example of Internet of Things (IoT) technology for agriculture.

Lead Author
Lead Author:
Rob Proulx, Extension Ag Technology and Grain Systems Specialist, NDSU Agricultural and Biosystems Engineering
Availability
Availability:
Web only
Publication Sections

LoRaWAN Technology

Long Range Wide Area Network (LoRaWAN) is an open, low-power, wireless communication protocol for the Internet of Things (IoT). This technology can be used to monitor farm assets and crop and livestock conditions, and it is an example of the IoT for agriculture, also known as smart farming.

Agricultural producers and businesses can use data gathered through the IoT for management decisions. This technology allows farmers to

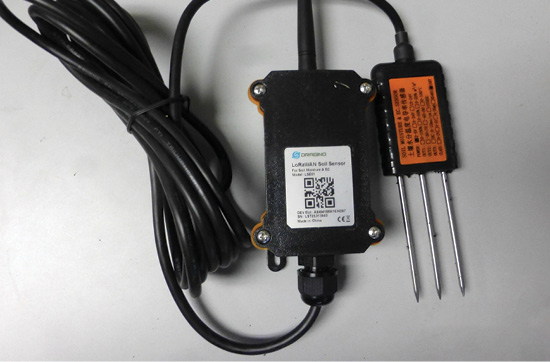
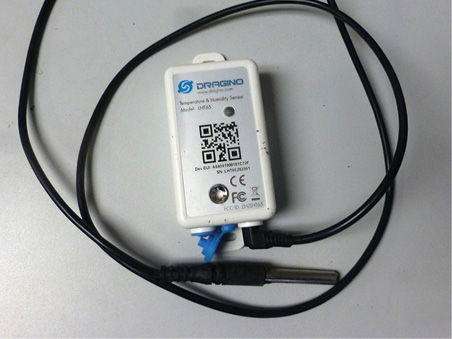
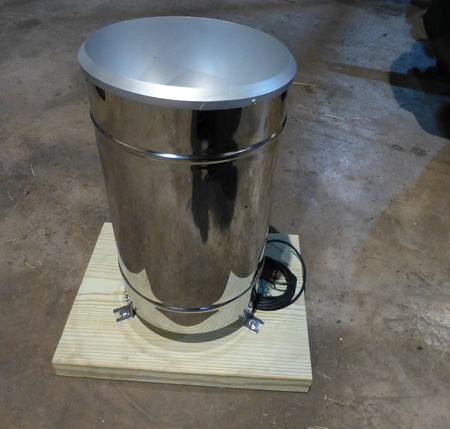
install small sensor devices in their crop fields to monitor conditions such as rainfall, soil moisture and temperature. Ranchers can use LoRaWAN technology to monitor stock tank water levels in remote pastures by viewing the data on their cellphones or computer monitors.

LoRaWAN uses a long-range and low-power wireless network to communicate between LoRaWAN gateways and remote nodes. LoRaWAN uses a license-free radio frequency that enables long-range transmissions (up five miles in rural areas) with low power consumption. The LoRaWAN protocols are defined and maintained by the LoRa Alliance (https://lora-alliance.org/), a nonprofit association of member companies committed to enabling large-scale deployment of LoRaWAN IoT through the development and promotion of open standards.

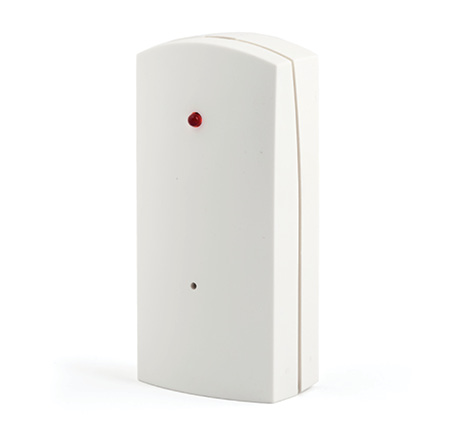
LoRaWAN nodes can be small and battery-operated sensor devices, which enables installation in remote locations. The LoRaWAN gateways communicate with the nodes, receiving the data from the sensor devices and transmitting signals back to the sensor devices for remote management. The LoRaWAN gateway also transmits the data to the internet so it can be viewed by users.

Figure 1
Photo Credit:
John Nowatzki, NDSU
Soil moisture sensor.

The LoRaWAN gateway uses high-bandwidth networks such as Wi-Fi, Ethernet or cellular to connect to the internet. Due to its additional subscription costs, the cellular connection is used only if a direct connection is unavailable.

The LoRaWAN gateways also require electricity to function. The electricity can be supplied by an AC electrical supply or by a 12-volt battery. If a battery is used to power the gateway, a solar charger is required to maintain the battery’s power.

Following its transmission to the internet, data must be managed for website availability. There are several options to manage this data. The method outlined in this publication uses an open-source software called The Things Network.

Figure 2
Photo Credit:
John Nowatzki, NDSU
Temperature sensor.
Figure 3
Photo Credit:
Istock
Motion sensor.
Figure 4
Photo Credit:
John Nowatzki, NDSU
Rain gauge sensor.

Using The Things Network to Manage LoRaWAN Systems

The Things Network (TTN) (www.thethingsnetwork.org/) is an example of a network server that can be used to receive data from gateways and make it available on the internet. The Things Network is a nonprofit, open-source online community dedicated to helping users manage LoRaWAN data from sensor devices and make it viewable on the internet.

The procedure to connect LoRaWAN nodes and gateways to The Things Network involves several steps. Each LoRaWAN gateway and sensor device is hard-coded with a unique address, a globally unique extended unique identifier (EUI). Each device’s EUI needs to be registered under a TTN application.

An example of an application on The Things Network could be several soil moisture sensor devices in crop fields, all connected to one LoRaWAN gateway using LoRaWAN communication. The application, sensor devices and gateway all must be set up and registered on The Things Network.

Viewing the Data on myDevices Cayenne

To make the data viewable on the internet, it needs to be displayed on a website. There are several options to accomplish this. The method explained in this publication focuses on using a free website called Zafron. Zafron is a dashboard, data logger, device registry and rules engine for IoT devices, including sensor data collected using LoRaWAN technology (https://zafron.dev/docs/intro). The Zafron online dashboard allows users to visualize sensor data and define rules to send email alerts if the data reach a specified level.

Figure 5
Photo Credit:
John Nowatzki, NDSU
GPS tag sensor.
Figure 6
Photo Credit:
John Nowatzki, NDSU
LoRaWAN gateway.

Procedures to Setup a LoRaWAN System on TTN

  1. Access the Things Network (TTN) at www.thethingsnetwork.org/.
    1. Scroll to “The workbench to get you started with IoT”.
    2. Click on “Create a free Account”.
    3. Click on “Join The Things Network” to create a sandbox account.
    4. A sandbox account is suitable for testing; for commercial applications, consider an account on The Things Stack Cloud.
  2. Create an account, log in and open the Console on TTN. (https://console.cloud.thethings.network/).
    1. On first opening the Console, select the North America network cluster.
  3. Create an Application.
    1. Click “Create Application”.
    2. For Application ID, choose a unique ID of lowercase, alphanumeric characters.
    3. For Application name, enter any name appropriate to the application.
    4. For Application Description, enter any description for the new application.
    5. Click “Create application”.
  4. Add end devices (sensors).
    1. Open the application TTN and click “Register end device.”
    2. Choose “Select the end device in the LoRaWAN Device Repository.” Under “End device brand”, scroll down the list of available Brands, and select the device brand name of your device.
      1. Under “Model”, select the model of your device.
      2. Under “Hardware Version”, select “Unknown Version”.
      3. Under “Firmware Version”, select the firmware version provided by the device manufacturer.
      4. Under “Profile (Region)”, for the United States, select “US_902_928”.
    3. Under “Enter registration data”:
      1. For “Frequency plan”, scroll down and select “United States 902-928 MHz, FSB 2”.
      2. For “AppEUI”, enter the value provided by the manufacturer. If you don’t have this, fill the box with zeros.
      3. For “DevEUI”, type in the EUI labeled on the device.
      4. For “AppKey”, enter the value provided by the manufacturer. If you don’t have this, click on the “Generate” button.
      5. For “End device ID”, enter any readable identification of your choice.
    4. To complete adding the device to the application, click on “Register end device”.
  5. Adding a gateway to The Things Stack Sandbox.
    1. Following manufacturer instructions, connect the gateway to the internet and set its LoRaWAN server address to ‘nam1.cloud.thethings.network’.
    2. Sign into your user account on TTN server.
    3. Click on the “Register gateway” icon. Complete the following steps:
      1. Gateway EUI: Enter the EUI provided by the gateway manufacturer.
      2. Gateway ID: Enter any unique identifying name.
      3. Gateway name: Enter any readable name.
      4. Frequency Plan: Choose “United States 902-928 MHz, FSB2”
      5. Required authenticated connection: Leave unchecked
      6. Share status within network: This box can be checked or left unchecked.
      7. Share location within network: This box can be checked or left unchecked.
      8. To complete adding the gateway, Click the “Register gateway” icon.

Procedures to Add a Cloud Integration to the Application.

Cloud integrations allow users to visualize the sensor data, set up text and email messages from the sensor data, and share the data with others. This example provides a step-by-step procedure to setup an integration on Zafron. Zafron is a free service with a simple, rudimentary interface, suitable for displaying real-time data from IoT devices.

  1. Create a Source in Zafron. Sources are endpoints for Zafron to receive data via HTTP. In this example, the Zafron Source is receiving data from The Things Network.
    1. Create an account on Zafron and log in (https://app.zafron.dev/).
    2. In Zafron, click on “Sources” in the top header.
    3. Click on “New Source”.
    4. Input a name and select ‘TheThingsNetwork V3’ as the provider.
    5. Click on “Create Source”.
    6. Under the “Actions” header, click the button to ‘Copy endpoint URL’.
  2. Create a Webhook in The Things Network. A webhook is an automated message sent from one application (for example, The Things Network) to another (e.g., Zafron) when a specific event occurs (e.g., a sensor reading).
    1. Log in to your The Things Network account.
    2. Click on “Applications” in the sidebar menu.
    3. Click on your application.
    4. Click on “Webhooks” in the sidebar, then click the “Add webhook” button, then click “Custom webhook”.
    5. For “Webhook ID”, enter any readable identification of your choice.
    6. For “Base URL”, paste the URL copied from Zafron.
    7. Under “Enabled event types”, check the box for “Uplink message”.
    8. To complete the webhook, click the “Add webhook” button.
  3. Create a Profile in Zafron. Profiles are device definitions for LoRa devices.
    1. In Zafron, click on “Profiles” in the top header.
    2. Click on “New Profile”.
    3. Input a name and select the Source you created in Step 1.
    4. Click on “Create Profile”.
    5. Navigate to the created profile.
    6. Select the built-in decoder for your device and click “Save”.
  4. Create a Device in Zafron. A Device in Zafron provides the data display for the connected end device (sensor).
    1. In Zafron, click on “Devices” in the top header.
    2. Click on “Add Device”.
    3. Select “LoRaWAN” as device type, input a name of your choice, enter the Device EUI from your end device (sensor) and select the Profile you created in Step 3.
    4. Once your device is successfully connected and receives a data uplink, the device readings will show on the Zafron dashboard.
Figure 7
Photo Credit:
NDSU Photo

Long Description:

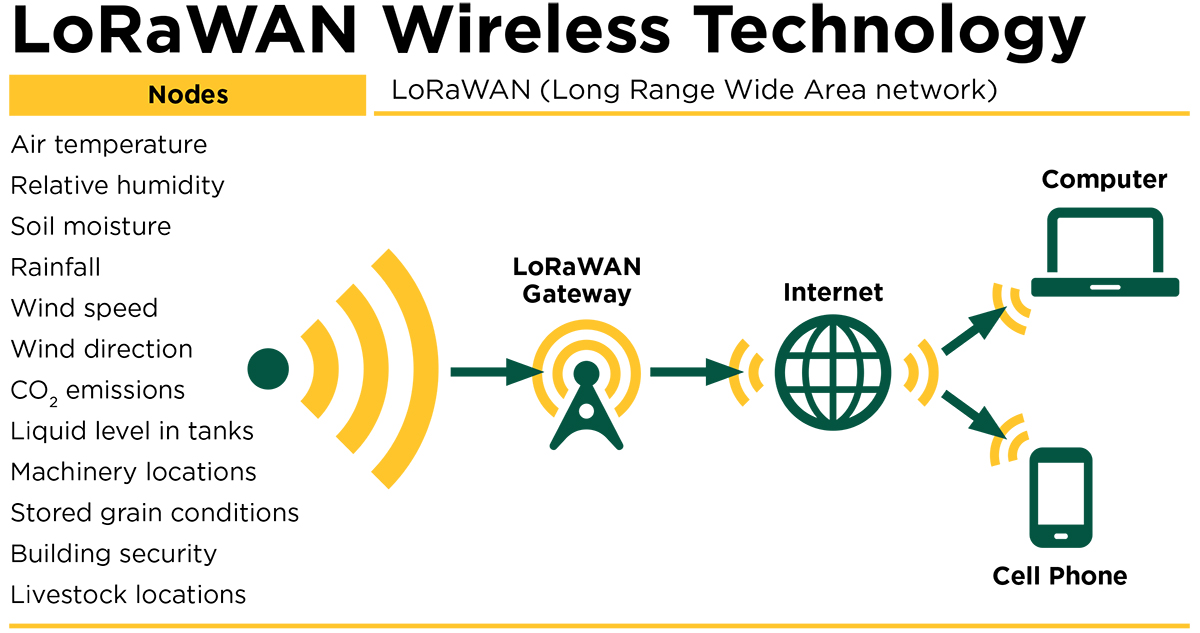
LoRaWAN Wireless Technology: Nodes like the following: air temperature, relative humidity, soil moisture, rainfall, wind speed, wind direction, CO2 emissions, liquid level in tanks, machinery locations, stored grain conditions, building security and livestock locations transmit the information wirelessly to a LoRaWAN Gateway which then sends the information to the internet where it can be accessed by a computer or a cell phone.

More information is available at www.thethingsnetwork.org/docs/

This publication was authored by John Nowatzki, Ag Machine Systems Specialist (retired), NDSU Extension Agricultural and Biosystems Engineering, 2022