Adding Message Center to Perceptive Toolbar
- Open the Perceptive Content desktop client and log in.
- Click Settings, and then click Options.

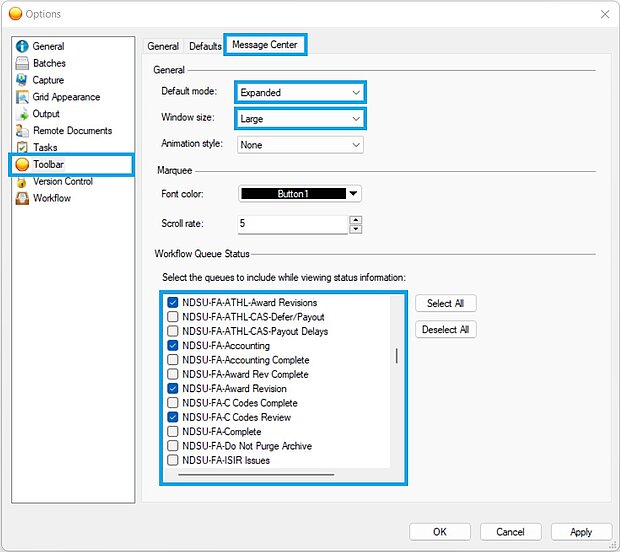
- In the next window, click Toolbar from the left side panel.
- Click the Message Center tab and select the desired workflow queues to be added to your message center.
- Confirm that Default mode setting is set to "Expanded" and you may use the Window size setting to select the size of your dashboard.

- Click [Apply] to save and keep the window open, or click [OK] to save and close.
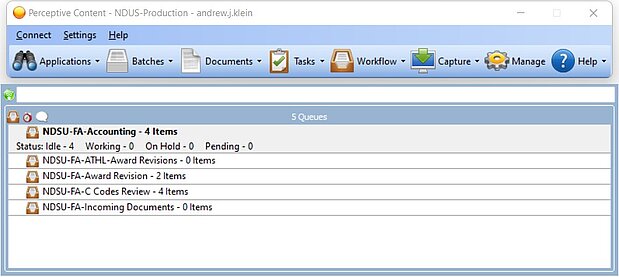
- Back on the client toolbar, click Settings, and then click Show Message Center to enable the message center dashboard.

- The client toolbar will now display a listing of selected workflow queues along with the number of documents that are in each queue. You may double-click any queue in the list to directly open that queue in workflow.

HAVE QUESTIONS about Document Imaging?... Please contact:
A.J. Klein, 701-231-7983, andrew.j.klein@ndsu.edu
213 Morrill Hall
Enrollment Management Administrative Systems
NDSU Dept. 2835 / P.O. Box 6050 / Fargo, ND 58108-6050
ndsu.imaging@ndsu.edu


